Ogof, which means cavern in Welsh, is a massive modulating reverb designed to create truly enormous sonic spaces. Its huge-sounding algorithm works with all MIDI and audio instruments, such as guitars, strings, and pads. It can also transform vocals and drum tracks into something unique and otherworldly.
The Main Interface
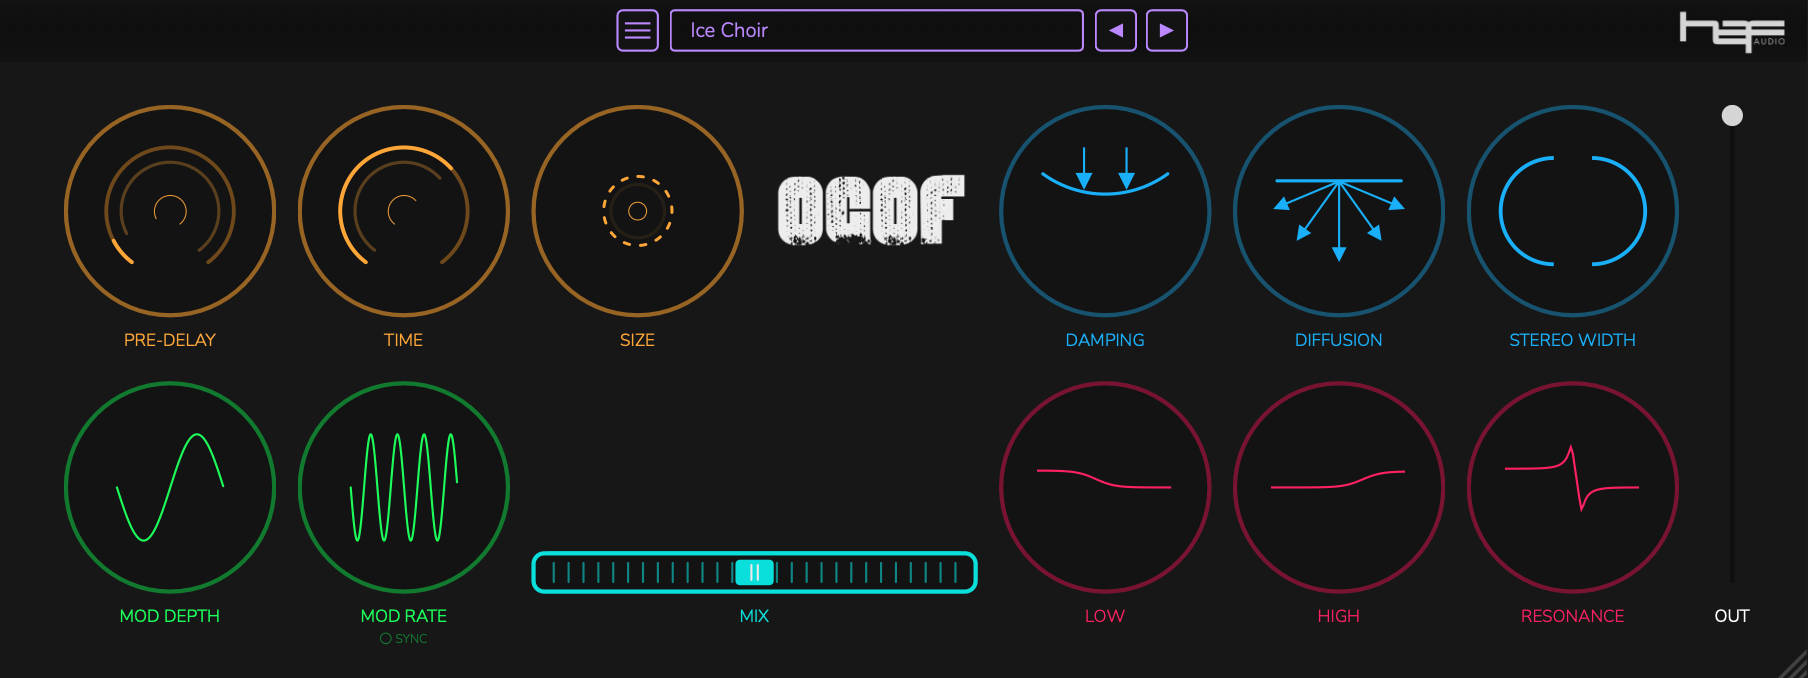
The main interface of Ogof has fourteen controls which can be used to dial in your desired effect:
- Pre-Delay
Determines the time between a sound being emitted and being processed by the reverb. This can be controlled in milliseconds up to two seconds. - Time
Sets the time over which the sounds should reverberate. Reverbs of up to 1 minute can be created. - Size
Controls the algorithmic space size of the reverb. This determines a number of tonal characteristics with the reverb. For example, a larger setting will have a lower, darker sound. - Damping
Adjusts how the high frequencies within the reverb decay over time. This simulates the absorption of sound in a real environment, where higher frequencies are absorbed more quickly than lower ones. - Diffusion
Controls the shape of early reflections. Values above 70% will produce a smooth exponential decay. Lower values produce a slower build-up of echoes, with very low values tending to sound thin or metallic and less realistic. - Stereo Width
Sets the width of the reverb wet signal with the stereo field. - Mod Depth
Sets the depth of modulation within the reverb tail. This can be used to effectively add some subtle motion to the output. - Mod Rate
Sets the rate of modulation within the reverb tail. See Mod Rate Sync below. - Mod Rate Sync
Located directly underneath the Mod Rate control, this button toggles the Mod Rate control between setting in milliseconds and setting in note lengths synced with the host tempo. - Mix
The mix slider controls the dry/wet mix of the effect. A spectrum analyser appears above the mix slider when the effect is processing sound. This analyser displays the wet signal, so it is unaffected by the mix slider. This makes it extremely useful for shaping your reverb parameters, as it allows you to see the effect of the controls on the internals of the reverb unit rather than the overall output of the unit back to the DAW. - Low
Controls the EQ of low-end frequencies within the reverb tail with a shelf filter from around 350 Hz. - High
Controls the EQ of high-end frequencies within the reverb tail with a shelf filter from around 2 kHz. - Resonance
Controls the resonance (Q) of both the high-shelf and low-shelf filters. - Out
The vertical slider marked “Out”, located on the right-hand side of the interface, controls the overall output volume of the effect.
Controls are set by clicking and dragging.
The UI can be resized by clicking and dragging the handle in the bottom right-hand corner. The UI can be reset at any time by clicking the top-left corner.
Using Presets
The quickest way to get started with Ogof and learn the effect of the controls is to browse the pre-installed presets and adjust them to create your own unique sounds.
The preset quick browse panel is displayed at the top of the main screen.

The quick browse panel displays the name of the current preset. The arrows to the right of the preset name will move you to the previous or next preset.
WARNING: When you change preset, you will lose any modifications to the current preset that you have not saved.
Click the preset name in the preset quick browse panel or the ![]() button to open the full preset browser.
button to open the full preset browser.
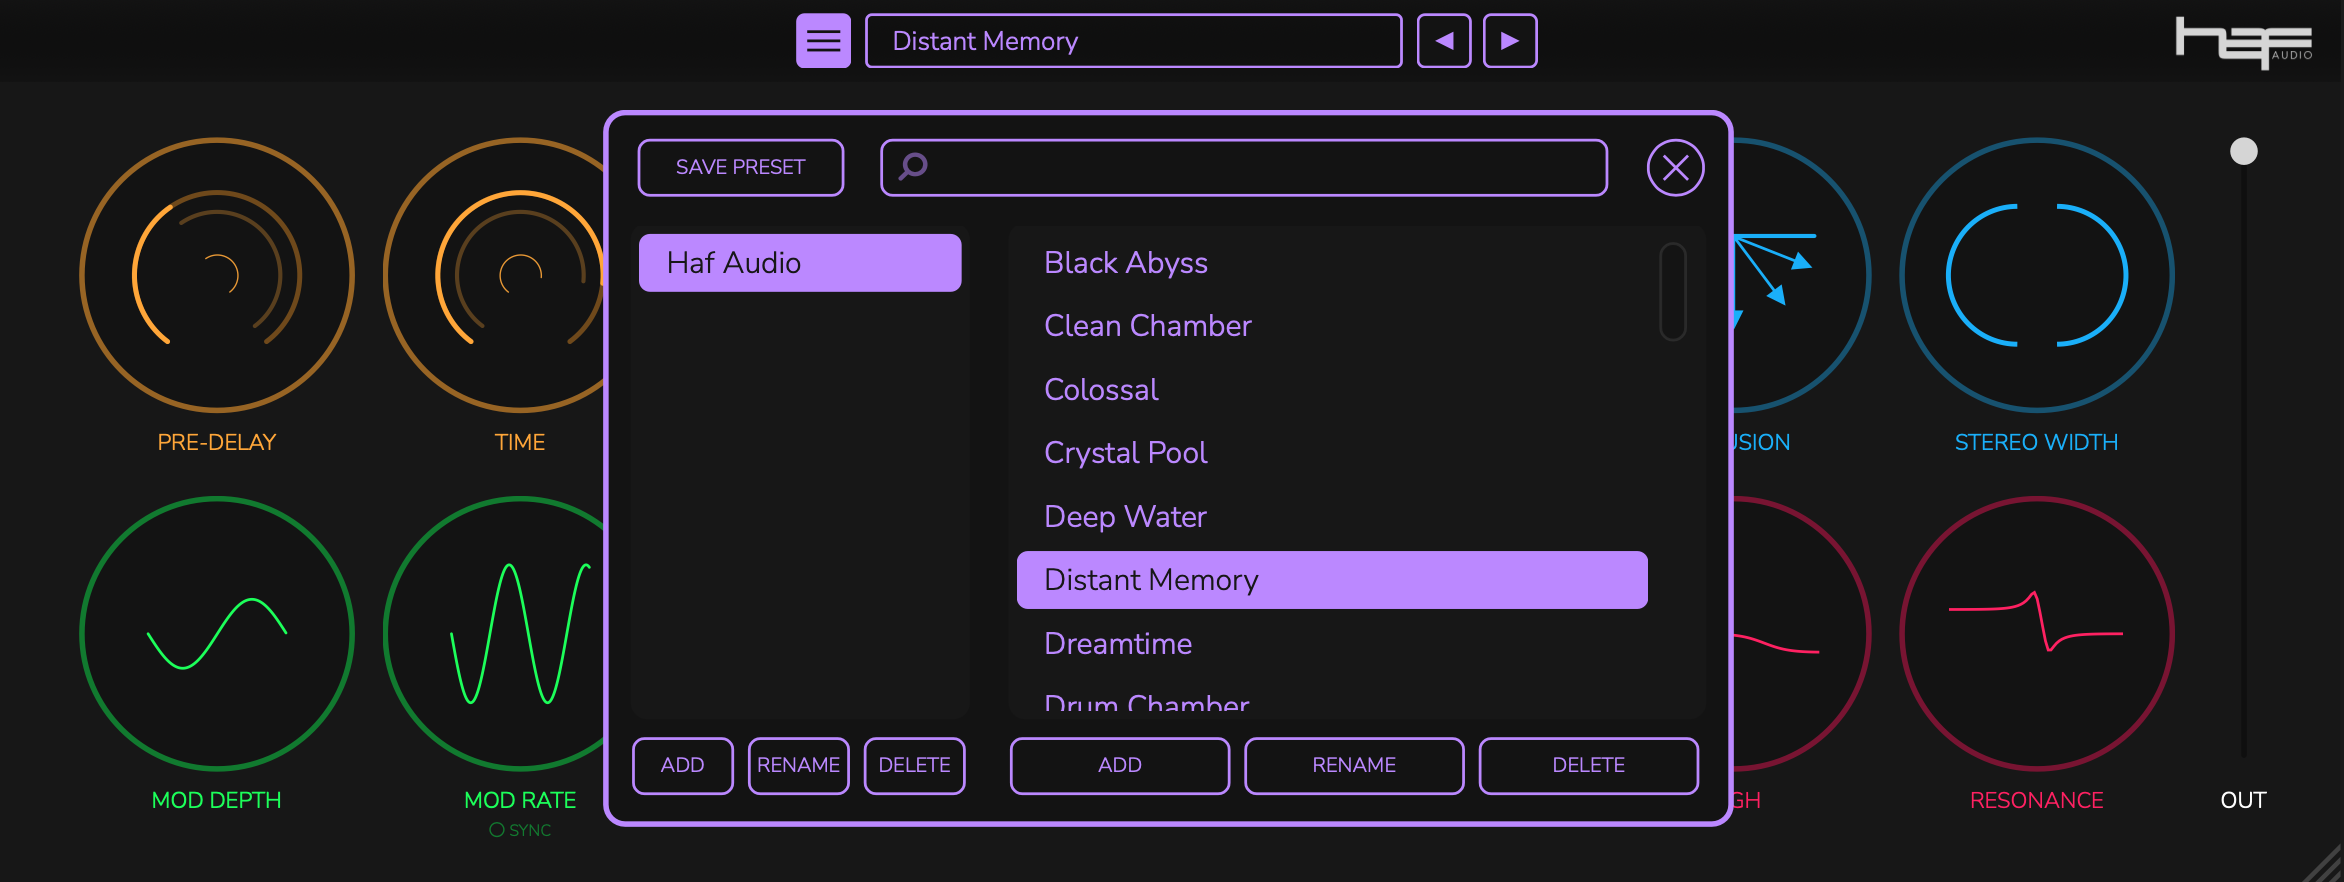
Presets are organised into banks and listed in alphabetical order. The search bar at the top of the preset browser allows you to search for presets by name.
Ogof comes installed with a selection of factory presets. These can be accessed by clicking the Haf Audio bank in the left-hand panel of the preset browser and then clicking on the preset name in the right-hand panel. The currently loaded preset is highlighted.
Creating Presets
To create your own preset bank, click the “Add” button under the left-hand panel and enter a name for your preset bank.

To add a new preset, select the bank you wish to add it to and click “Add” under the right-hand list of presets.
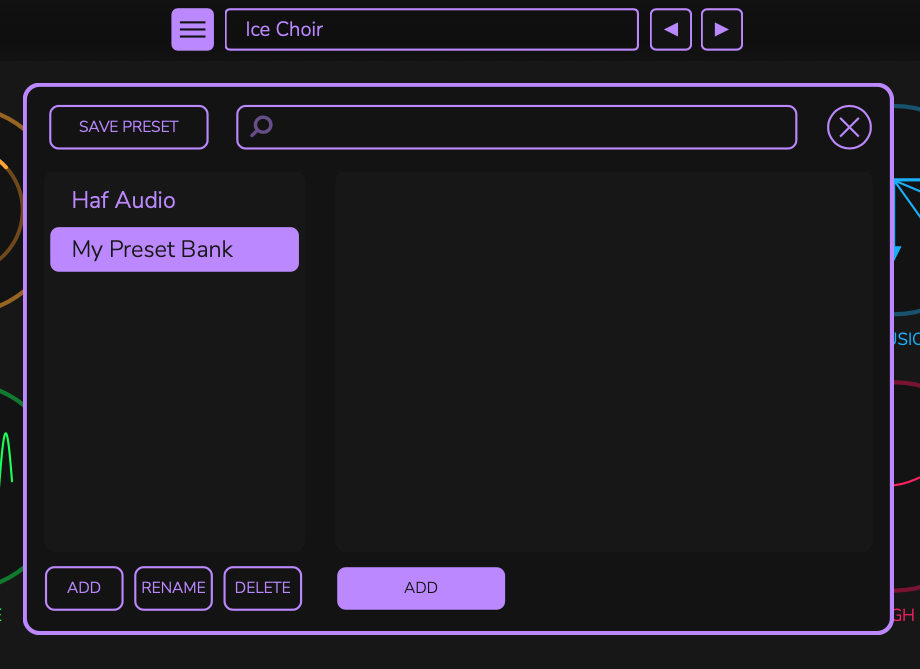
Enter the preset’s name and click “OK” to save it. The new preset will now appear in the browser.
Editing & Saving Presets
Presets and preset banks can be renamed and deleted using the buttons under the relevant section. To save changes to an existing preset, click the “Save Preset” button in the top-left of the preset browser.

A confirmation message will be shown when saving edits to an existing preset. Click “OK” to save the preset or “Cancel” to abort the save process.
NOTE: You cannot add, save, delete or rename presets in the Haf Audio preset bank which comes preinstalled with Ogof.
Press the close button ![]() on the top-right of the preset browser or the
on the top-right of the preset browser or the ![]() button to return to the main user interface.
button to return to the main user interface.